In this blog post let me walk you through creating a Docker Container for a Node JS Application.
In case you haven't been introduced to Docker yet then please check out Kunal Kushwaha's Blog. This will give you a clear understanding of Docker .
Let's get started....
What you will learn
- Concept of containerizing a Node.js application.
- Dockerfile ,it's contents and how to create it.
- Creating a Docker Image from the Dockerfile.
- Running the application via the Docker container.
- Stop and remove containers.
Prerequisites
- A Node JS application or you can use this starter project
- Install Docker Desktop (Not mandatory)
- Docker basics and setup Kunal Kushwaha's Blog
Concept of containerizing a Node.js application
Docker bundles your application and its environment so it runs without errors in production or any other system just like it does on your local machine. It achieves this by running the app within a Docker container. A Docker container is created from a Docker Image which in turn is created from a Dockerfile.
Dockerfile ,it's contents and how to create it
A Dockerfile is basically a set of instructions to create a Docker Image.
A few of the common instructions are :
FROM
FROM base_image
eg. FROM node:12-alpine
Every Dockerfile starts with this command. It is used to set the base image. Here we are using node:12-alpine as the base image. This image is pulled from Docker hub repository.
WORKDIR
WORKDIR /directory_name
eg. WORKDIR /app
This instruction sets the working directory for all the following instructions i.e. actions from this point forward should be taken from the /app directory.
COPY
COPY source destination
COPY . .
Copies files from source (host system) to the destination( ./ present location in the image)
RUN
RUN yarn install --production
RUN command installs all the required app dependencies. RUN executes a command on the image at the working directory location.
CMD
CMD ["executable", "param1"]
eg. CMD ["node", "src/index.js"]
CMD specifies the default command to be executed when running the image. You can think of it like the start or home page of an application.
EXPOSE
EXPOSE port
eg. EXPOSE 3000
This instruction is used to expose ports from within the container to the host machine. However if we don't do the -p port:port it still isn't exposed so in reality this instruction doesn't do much. You don't need EXPOSE.
Creating a Docker Image from the Dockerfile
Open a terminal at the root of your application directory, where your Dockerfile is located eg. cd f/Todo/app. Now, run the following command
docker build -t [application name] path
eg. docker build -t node-image .
-t is the tag which is used to give the image a name. Here [application name] is simply the name you wish to give your image. Path refers to the location of the application in this case '.' or current directory
Running the application via the Docker container
Now we can use the Docker image we just created to run our container like so
docker run -dp port:port image-name
eg. docker run -dp 3000:3000 node-image
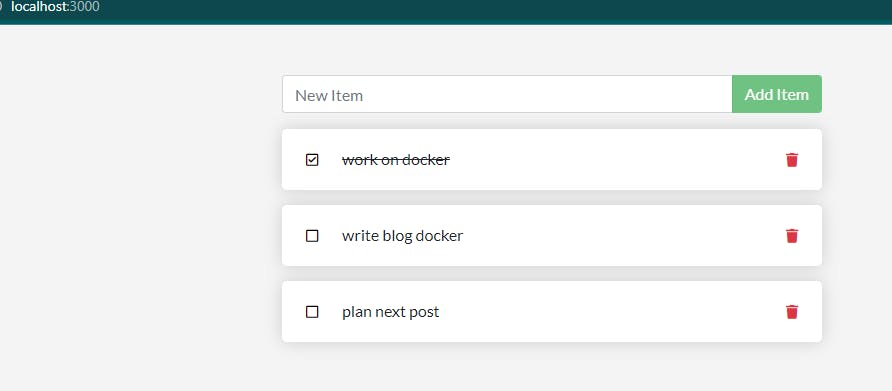
Open your web browser to localhost:3000, you should see the TODO app running.
You can also open up Docker Desktop to view and manage the running containers.
At a glance
- Open the app folder from the starter project using any code editor of your choice.
- Create a new Dockerfile inside the app folder with the content similar to the one shown below.
FROM node:12-alpine #the base image used to run the app WORKDIR /app #sets the working directory COPY . . #copy current directory contents into /app RUN yarn install --production #install dependencies for the app CMD ["node", "src/index.js"] #default command to run when the app starts EXPOSE 3000 #expose ports from within the container to the host machine - Open a terminal at the root of your application directory, where your Dockerfile is located
- Build the docker image from the Dockerfile we just created
docker build -t node-image . - Start the container using docker run command
docker run -dp 3000:3000 node-image - Open your web browser to localhost:3000, you should see the TODO app running.
Stop and remove containers
To list the running containers run this command
docker ps
to stop and remove the container execute this command
docker rm -f <the-container-id>
Replace out "the-container-id" with the ID from docker ps
Note : In case you make changes in the project code you will have to create a new Docker image for the changes to reflect in the app.
That's it for this article. These are just my learnings and interpretations that I have shared.
I have a lot to learn and I'm always looking for resources and mentors to learn from, so your feedback and suggestions are always welcome.
Thank you!!
